Make a masquerade mask more striking by adding sewable LED's.
The circuit requires some previous knowledge of E-Textiles and some basic textiles knowledge.
I used lace and white cotton but other fabrics could be used.
Level of difficulty:
Intermediate

Parts list:
- approx 20cm x 40cm of cotton for a base fabric, and the same for a top fabric (lace in this instance)
- a shop-bought mask to work onto (you can make your own if you choose)
- white cotton thread
- PVA glue
- Bondaweb
- Ribbon
- Velcro
Electrical parts
- 10 x sewable white LED boards
- Conductive thread
- Conductive fabric
- 2 x miniature coin cell holders and 2 cell batteries
How to make the mask
First you need to cut out a piece of cotton fabric roughly the same shape as your mask, but with enough excess to be neatly tucked under. This will be the first layer.

You are going to sew the circuit onto this piece of fabric before you attach it to the mask. This is shown below.

The concept for the mask is that the LED's will light up when the ribbon is tied and the circuit is completed. So the circuit on the fabric cannot be complete.
You can see in the picture that the positive side of the circuit is not connected between the LED's and the batteries. This is because if they were the LED's would always be lit, regardless of the ribbons which attach the mask.
So, when you are sewing the circuit, sew the negative side all the way along between the batteries and LED's, but stop it at the last LED. Do not connect the batteries and LED's on the positive side. The positive side for the LED's will go down one ribbon, and the positive side of the batteries will go down the other. When they meet the circuit will be completed.
You can sew the LED's in any pattern you choose, just ensure that the circuit is laid out in the same fashion.

I covered the circuit with a strip of fabric because you would be able to see it through the lace I was using. I cut small holes for the LED's.
Before you do the next step test your circuit using crocodile clips.

I then glued the fabric onto the mask, sticking the overlapping fabric on the underneath side. Don't worry, the glue won't affect the circuit!
Leave the sides where the ribbon will attach un-glued so you can get into them later.

Next, I glued on the lace. With the lace I did not tuck the excess underneath because I found it looked neater if I cut the excess off. As long as there is glue along the edges it will not fray.
Again, leave the ribbon sides un-glued.
Test the circuit again.
.jpg)
Now for the ribbon which will attach the mask.
I used ribbon that was 1 inch wide as I intended the fold it over, and sandwich the conductive thread inside.
.jpg)
I ironed the ribbon to fold it over. I used pins to hold it in place while I ironed it. You want 2 separate pieces of ribbon.

I cut the bondaweb in half so it would fit inside the ribbon.
I put the bondaweb in, then the conductive thread, as shown below.


My mask already had slots in the sides for the ribbon to go through. If yours doesn't you can sew the ribbon onto the fabric of the mask.
I wanted the conductive thread to come out of the ribbon at the point where the ribbon attached to the mask. So I made a small hole and carefully teased it out.

I then hemmed the ribbon around itself to attach it onto the mask.

I then sewed the conductive thread from the ribbon through the fabric and around the positive side of the battery. Make sure the sewing is nice and tight.

Do the same on the other side with the second piece of ribbon, attaching it to the positive side of the LED's.
Next we need to finish the ribbons and complete the circuit. I did this by using velcro for the fastening, and conductive fabric for the 2 sides of the circuit to connect.
Work out how much ribbon you need for the ribbon to secure around your head. This determines where the velcro will attach onto the ribbon.
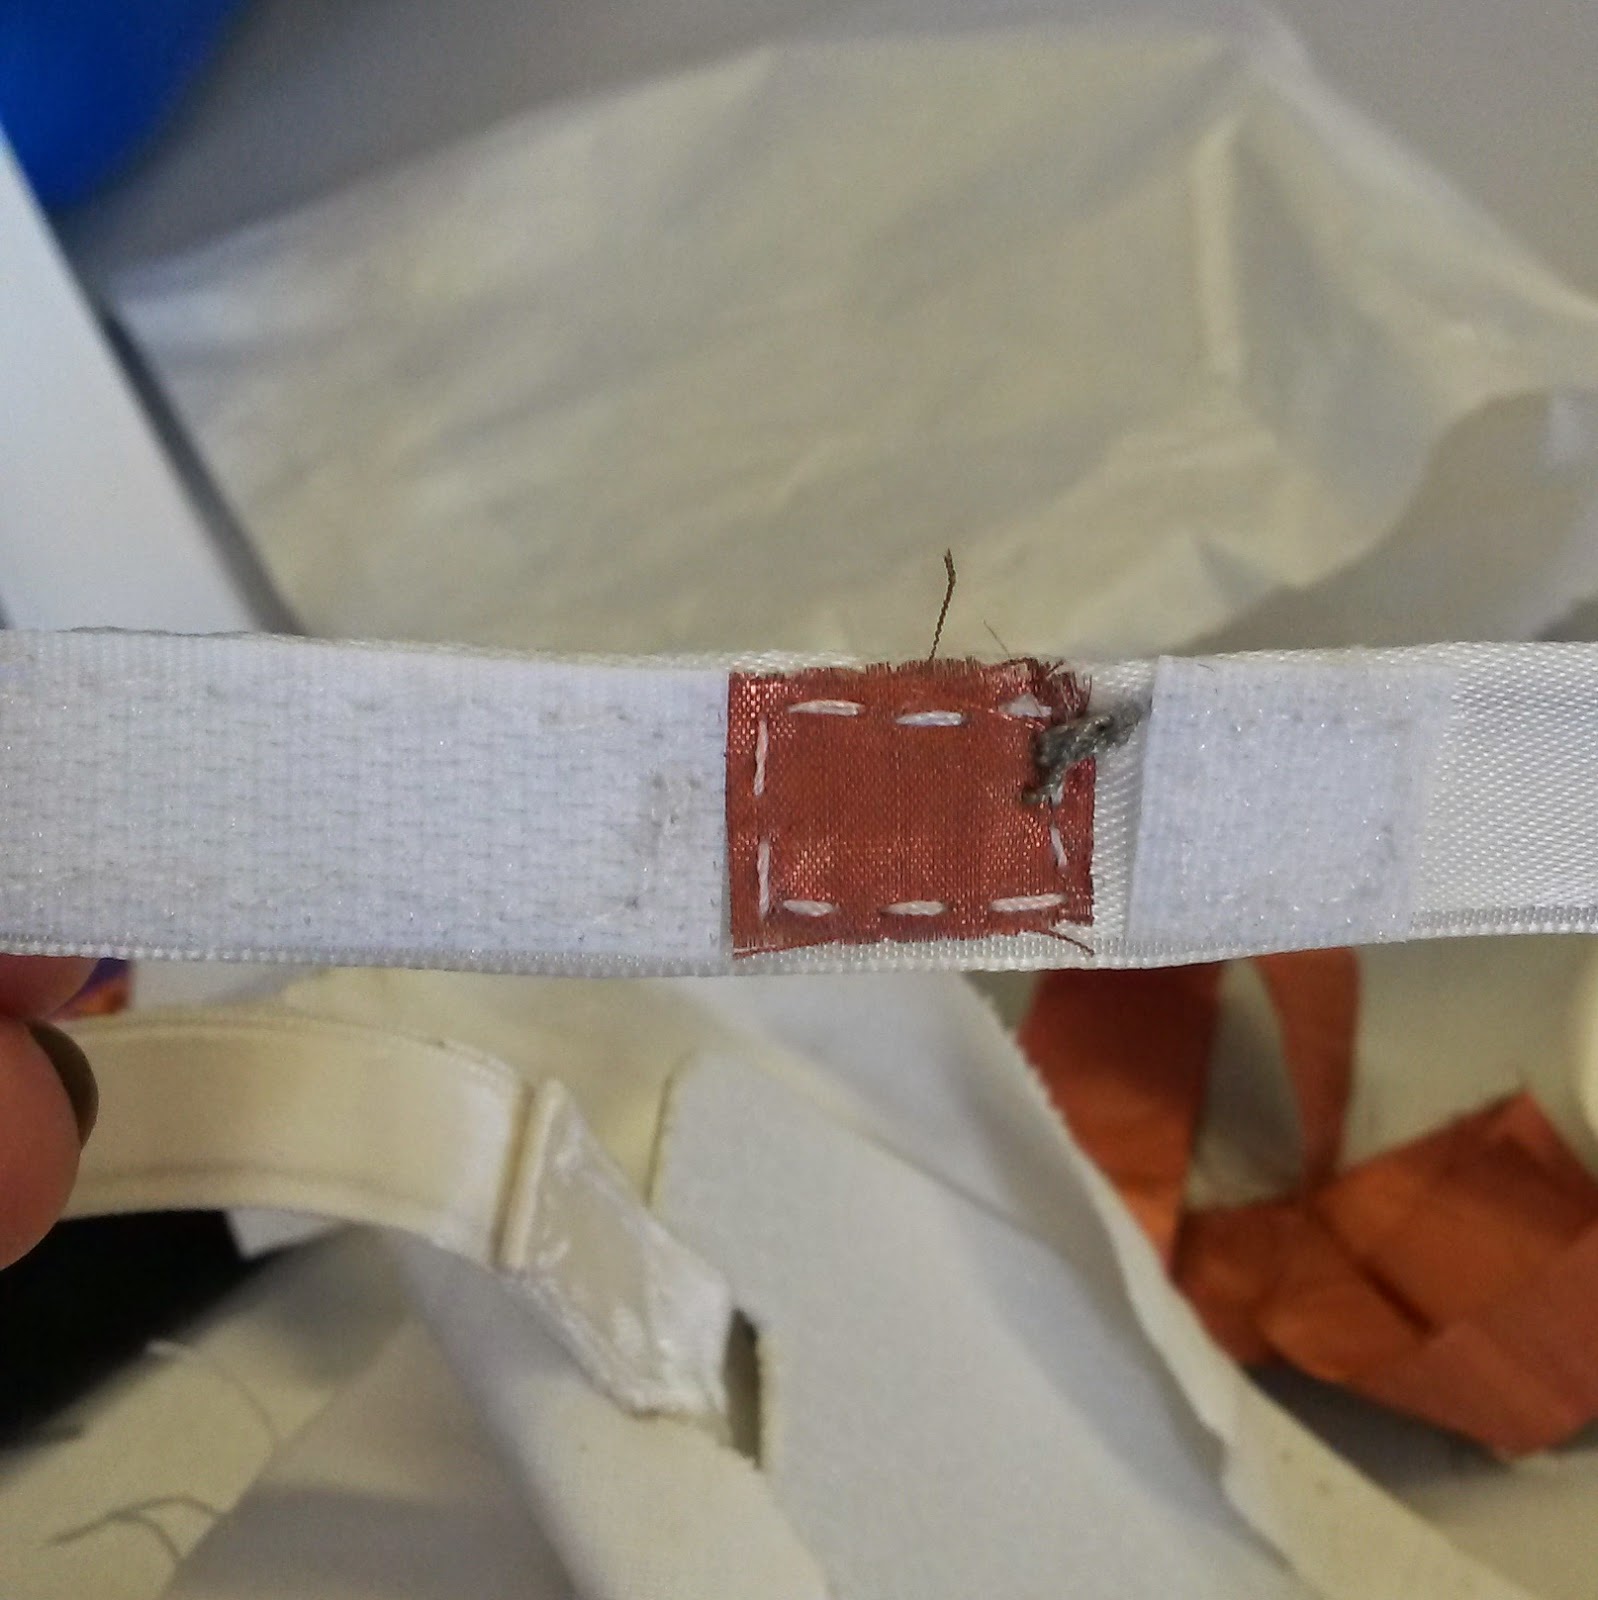
Once you've worked that out you can sew a small square of conductive fabric onto the ribbon. There will be velcro on either side of it.
I would recommend using several layers of the conductive fabric. Because of the height of the velcro on the ribbon you should build the fabric up so the sections can easily touch when fastened.
Before you sew on the fabric, tease the conductive thread out through a small hole, as before. The thread will be sewn onto the fabric.


Next sew the velcro on either side of the fabric.
Do the same on the other side.

Try the mask on! It is complete!


At this point you can add any further embellishments, like beads, feathers or jems.